Nondestructive monitoring of hybrid cast component quality

Lightweight construction is increasingly using cutting-edge hybrid designs made of fiber-reinforced composites and lightweight metals, which combine the advantages of both material groups in the hybrid material. The joints are realized using state-of-the-art gluing or riveting techniques. Over the past few years, Fraunhofer IFAM has developed a new kind of joining technology for various diecast hybrid joint types. For the safe use of the hybrid cast components, three Fraunhofer Institutes are now collaborating to research testing concepts. In this way, they want to pave the way for industrial-scale production.

The combination of diecast alloys and fiber materials or wires opens up new possibilities for components with lightweight designs, demand for which is increasing in a wide variety of sectors – the automotive and aerospace industries in particular. Before now, however, a technique has been lacking that would permit the nondestructive monitoring of such hybrid components, which is a precondition for industrial implementation. And so in the HyQuality – Hybrid Cast Manufacturing With Standardized Quality Assurance project, the Fraunhofer Institutes IIS/EZRT, IZFP and IFAM are contributing their respective expertise to jointly develop suitable methods for this purpose. The goal is to devise a nondestructive inline testing system that renders all fault types in hybrid components visible and thus testable.
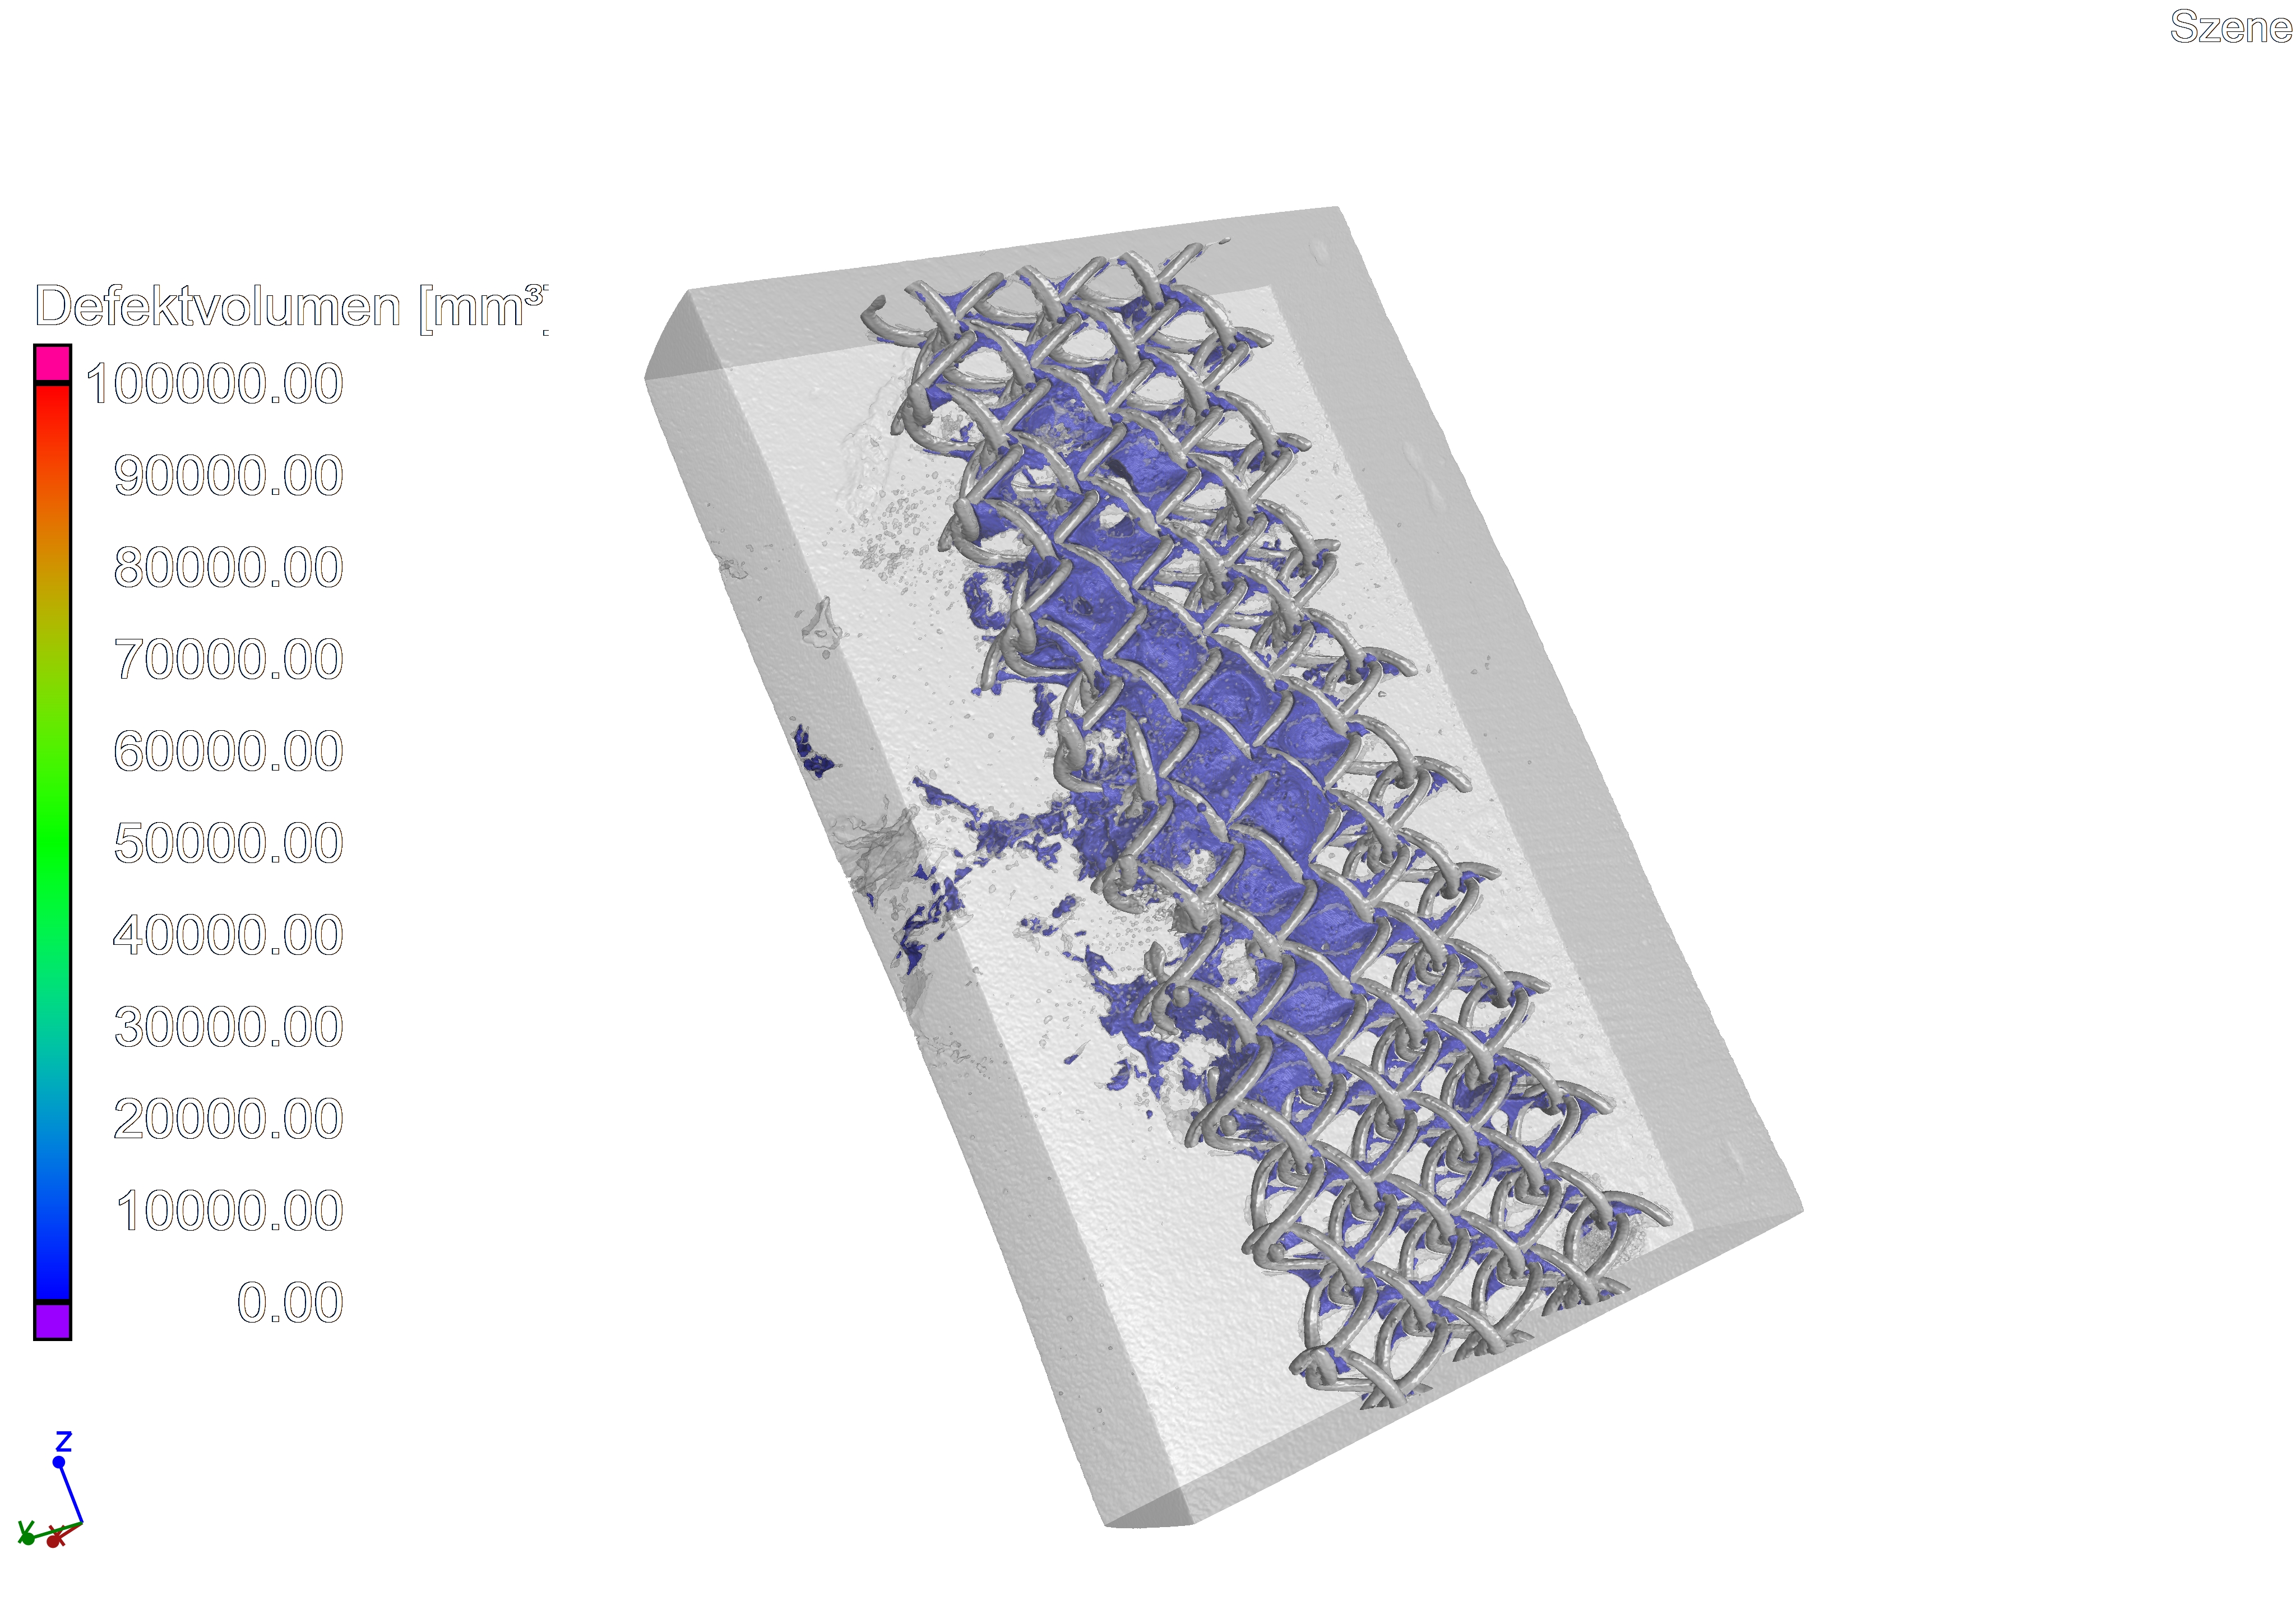
Nondestructive monitoring – Peering inside the component

3D-CT scan of a hybrid component with wire mesh insert material. The cavity (blue) shows that the molten aluminum did not properly infiltrate the mesh during the casting process.

To be able to pinpoint the contact surface between the fiber, wire or sheet metal reinforcement and the cast matrix and evaluate its quality, an imaging technology is needed that represents the material in as high a resolution as possible. X-ray technology, computed tomography and thermography are three of the technologies that come to mind as possible candidates.

Industrial X-ray technology and especially computed tomography offer effective monitoring for the three-dimensional inspection of components. Because they are able to look inside components, they are highly adept at rendering visible even tiny defects inside the material. The Fraunhofer Development Center for X-ray Technology is a leading international research and development center in this technological field and possesses core competencies in nondestructive monitoring at all stages of the product life cycle. A major focus of development work is on production monitoring in foundries with inline CT systems that recognize deviations from the optimal production process at an early stage.

In addition to X-ray techniques, the project also uses thermographic, acoustic and magnetic testing methods, which are employed by the Fraunhofer Institute for Nondestructive Testing IZFP in Saarbrücken. Active thermography allows quick and easily automatable fault detection, such as the recognition of broken fibers and delamination in CFRP components or the detection of cracks. Depending on the component, this involves exciting the material using optical pulses, ultrasound or induction, and then with resolutions of approx. 15 millikelvins and an image frequency of 20 kilohertz, the tiniest fluctuations in the heat flow, such as those caused by defects, can be recognized. X-ray inspection is equally varied in its forms. Depending on the requirements, the project team carries out tests with electromagnetic ultrasound (EMUS), air ultrasound or high-frequency ultrasound in a water bath. This selection is supplemented by the use of multi-frequency eddy-current tests. Using exciting frequencies from 100 hertz to 10 megahertz, it is possible to detect structural differences in the metal as well as delamination and cracks.

The development team’s aim is to evaluate all techniques with respect to the inline testing of hybrid cast parts. To determine the suitability of each of the nondestructive testing methods and draw a scientific comparison, the specimens and components manufactured in the project are subsequently destroyed. The results of the destructive test are then used as reference values against which the results of the nondestructive tests are compared.