Fundamentals of Industrial Computed Tomography

What can I do with computed tomography (CT)?

X-ray computed tomography is a technology for measuring the distribution of densities within an object in all three spatial directions. The result is a so-called volume dataset comprising the whole measured object. Internal details, such as defects or inaccessible components, are rendered visible with high geometrical accuracy, irrespective of their surroundings.

In conventional two-dimensional X-ray images, by contrast, all materials and details appear superimposed in an image acquired behind the object.

What are the possibilities and limits of CT?

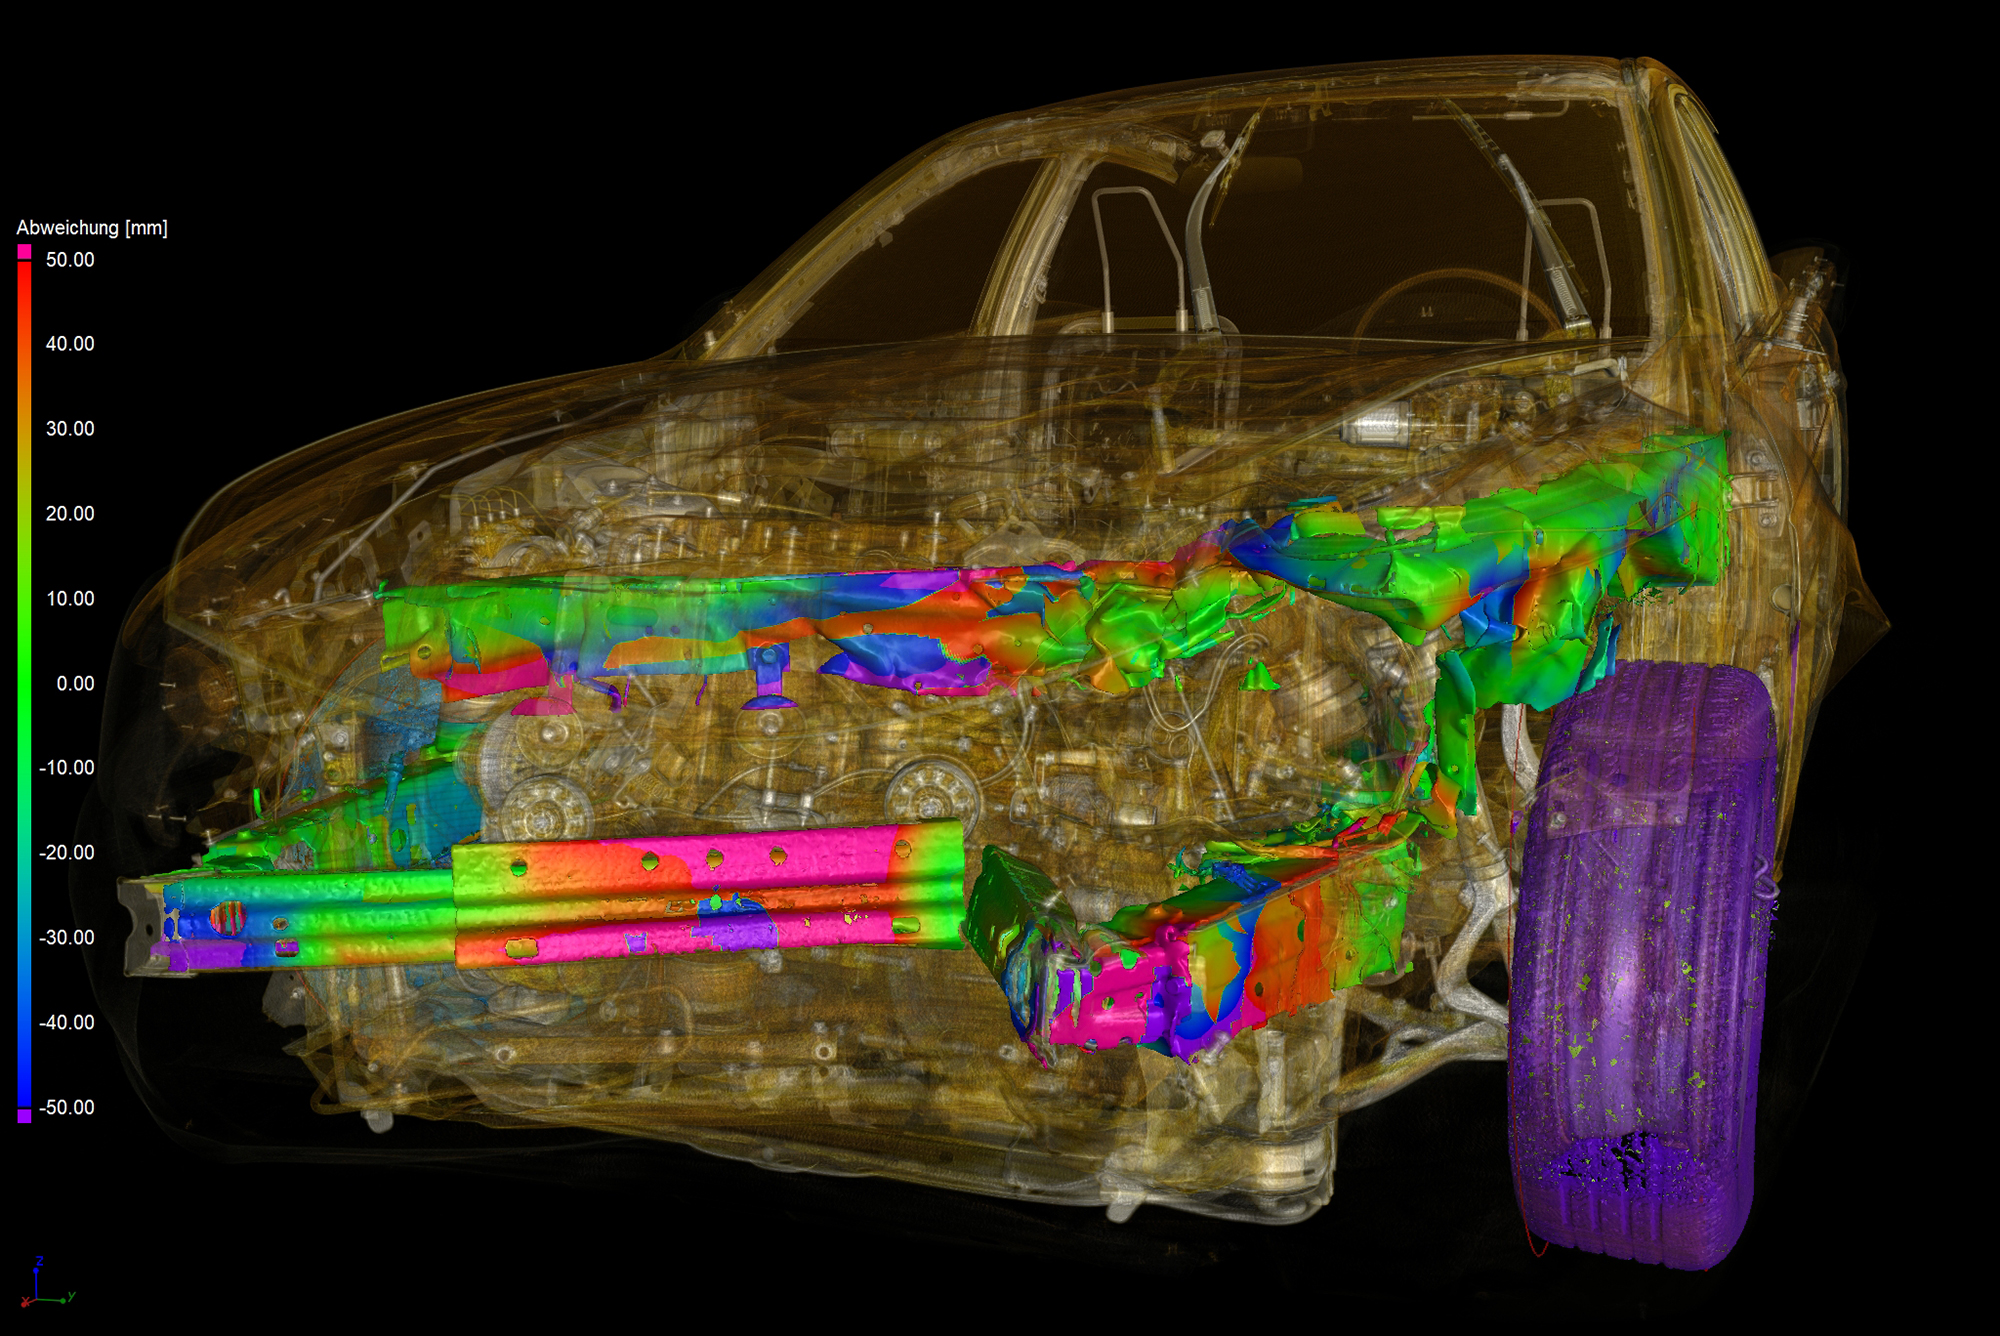
Since a very wide range CT systems with a wide range of X-ray sources is available at the Fraunhofer EZRT, we can examine an extraordinarily wide variety of objects. They start with tiny samples of organic material that can be imaged with a spatial resolution of less than 100 nanometers. The upper limit is several meters so that we can also tomograph shipping containers, sections of wind turbine blades or whole vehicles with pixel sizes below 200 micrometers. The limits are only reached when objects are too large to fit in the tomograph or they attenuate the X-radiation so much that no signal reaches the sensor side.

© Fraunhofer IIS
XXL computed tomography of a crashed vehicle with segmented components. The different colors visualize the deviation from the crash simulation.

What is easy to image using CT and what is difficult?

© Fraunhofer IIS
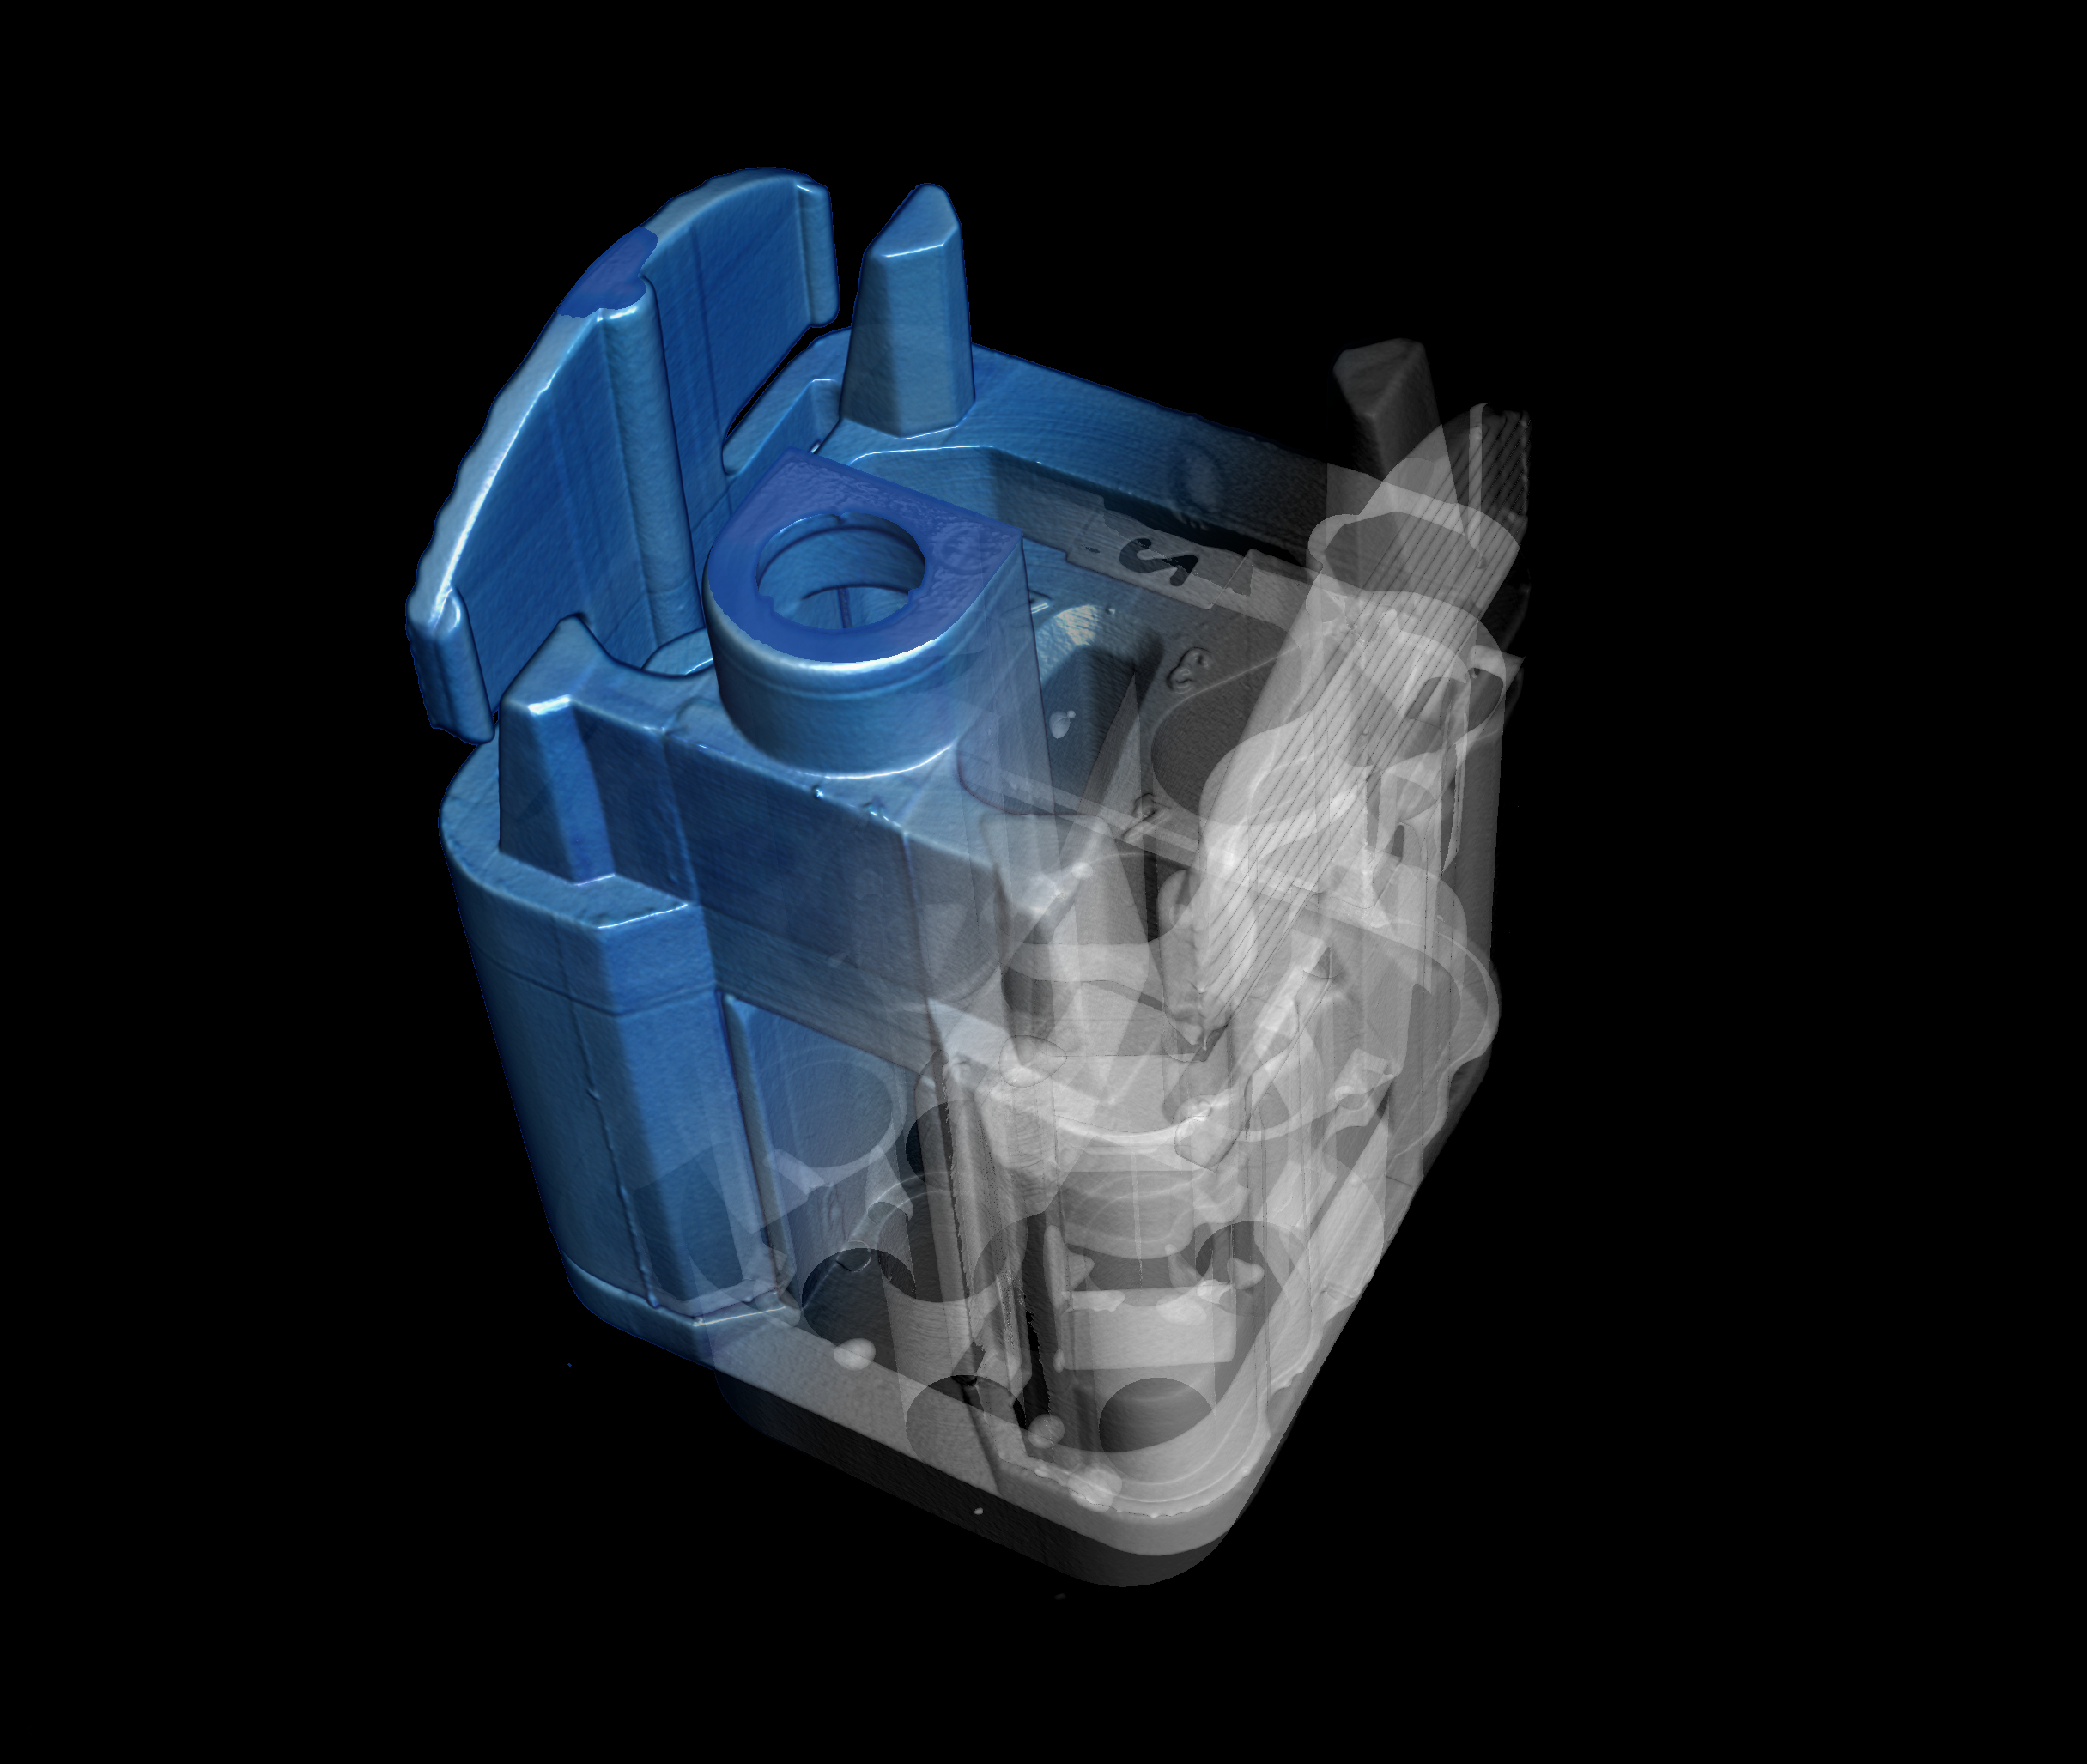
3D visualization of a plastic component

To be able to calculate volume images, a series of radiographs must be made from as many angles as possible during a CT acquisition. These should ideally comprise an angle range of 360° because the object must be radiographed "from all sides".

This can most easily be achieved with compact objects, that is objects that are approximately spherical or cylindrical. Difficulties can arise with certain object shapes, for example, with boards or composite fiber boards that cannot be rotated completely in the radiation field without colliding with the X-ray source or the imaging sensor.

The denser the material and the larger the object, the higher the intensity of the X-radiation required to penetrate the object. At the same time, the exposure time required to achieve an adequate signal-to-noise ratio in a single acquisition can increase so that the complete measurement takes correspondingly longer. Technical metals such as copper, molybdenum, lead or tungsten require more effort than light materials such as aluminum, wood, organic materials or carbon fiber-reinforced plastics. 

To tomograph delimited subregions of a larger object, such as a car body, robots are used that carry the sensor or the X-ray tube. The robots are programmed to acquire as many radiographs of the region of interest as possible from different directions. This technology requires precise coordination of the robots and careful planning of the scanning process. 

The result of CT imaging will generally be better if the object can be acquired more completely, the radiographs are sharper, the noise is lower and the contrast is greater and the geometry of the scanning procedure is known more precisely.

What do I need to be able to use CT in my company?

You should consider the purpose of the equipment and the most frequent tasks in your company in advance. It is not enough just to purchase a CT system.

Due to the considerably data volumes that occur in computed tomography, an IT system, i.e. (several) workstations with a high CPU power and an archiving concept are required in addition. You also need suitable rooms and must take radiation protection precautions as the owner-operator. Finally, personnel have to be planned for and trained to operate the system.    

As a newcomer to CT, you should first familiarize yourself with the technology. Experts have drawn up publications and standards for this purpose and relevant seminars are also offered.

The DGZfP publication D6 "Anforderungen und Rahmenbedingungen für den Einsatz der Röntgencomputertomographie in der Industrie" (Requirements and constraints for the use of X-ray computed tomography in industry) and the sheets of the standard VDI/VDE 2630 "Computed tomography in dimensional measurement" are recommended.

The Fraunhofer EZRT also offers regular training courses.

Blaue Türen der Strahlenschutzkabinen am Fraunhofer EZRT
© Fraunhofer IIS/ Gerhard Hagen
Radiation-shielded cabinet at Fraunhofer Development Center X-ray Technology EZRT.

What is the workflow like?

A central aspect of data acquisition is the rotary movement of the object in the X-radiation. It is therefore important that the object under examination is firmly located on the rotary plate. If the spatial resolution is to be a few micrometers or less, it is obvious that the tiniest vibrations or displacements of the object will severely impair the result.

If the surrounding material contains strongly shielding substances, we can easily tomograph it, too. The object under examination can be subsequently "digitally unpacked" in the volume dataset.

If the object is positioned on the rotary plate in such a way that it remains fixed in the same location unchanged for several hours, the doors of the radiation protection booths are closed and the data acquisition operation is started. After the raw data have been recorded completely, the radiation source is switched off and the object can be removed from the CT system again.

Special software calculates the volume dataset from the radiographs. When necessary, correction algorithms are also used in this workstep. Finally, the three-dimensional images can be viewed in suitable image viewing software and evaluated using numerous digital tools.

What CT systems are there?

Industrial CT systems are more versatile and varied than medical CT systems. The CT systems are therefore divided according to various criteria, e.g. X-ray source used, purpose or acquisition geometry, which is described using the so-called trajectory. The trajectory refers to the movement of the X-ray source relative to the object.

The industrial standard concept is known as circular CT whereby the object rotates through 360 degrees in a fanned or conical radiation field of an X-ray source. Another widely used method is called helical CT because the source detector system executes a helical movement ("helix") around the object. In industrial CT, only the object executes the identical planar rotary movement as in circular CT, but the source and detector are translated vertically in synchronous at the same time, resulting in a helix. In medical CT, by contrast, a human patient is moved along a horizontal axis around which an X-ray tube and detector pair is rotated, which also results in a helical path of the X-ray source around the person being examined.

Sometimes, the extent of the object or an unfavorable aspect ratio of the object under examination limits accessibility. Special methods have been developed for when a circle or helix cannot be executed. In region-of-interest CT (ROI-CT), only a section of the object is tomographed. If the object is only accessible from a limited angle range or is flat and wide in shape, limited-angle CT or laminography is more suitable. Since the object is not completely in the beam path in this method, there are limitations in terms of the image quality.
With robot CT, by contrast, trajectories can be moved with relative freedom. The imaging components X-ray source and detector are guided by cooperating robots.

The intended application makes different demands on the CT system: Inline CT requires fast in-production testing in the production cycles with typically fully automated data evaluation. Dimensional measuring tasks make higher demands, e.g. on the handling system. The positioning accuracy of the traversable axes is paramount. The more traversable axes a CT system has, the more flexibly it can be used for various tasks.
  
A subdivision based on the focal spot size into macro (> 1mm), mini (0.1 - 1mm), micro (1 mu - 100 mu) and nanofocus tubes (< 1 mu). Special cases are linear accelerators with focal spot sizes of 0.5 - 3 mm.

Neutron tomography works on the same principle, but uses neutrons instead of X-radiation. It images organic material with strong contrast and easily penetrates metals and as such is considered a complement to X-ray CT.
What information is generated in CT?

First of all, a 3D volume dataset is generated in each CT, which represents a three-dimensional image of the density of the acquired object. This can be considered and evaluated manually with suitable software. There are various software-based evaluations that can be performed on such a volume. These include:

  • Detection of anomalies (e.g. defects such as pores and shrink holes in castings)
  • Measurement tasks (e.g. target-actual value comparison, determining wall thickness)
  • Fiber characteristics in fiber-reinforced plastic parts
  • Morphology of components

The end results of an evaluation are often presented in a standardized test report, which summarizes, for example, information about quality and/dimensional accuracy of the examined object. This can be provided both in analog and digital form.

Methods


Data acquisition

We offer design and configuration services for customized and application-specific software for generating measurement data, which lead to optimum test results in downstream methods


Correction and data enhancement

Inadequacies in your X-ray system can compromise optimum image quality. Our solutions enable the best results possible.


Reconstruction

In the area of X-ray imaging, 3D image data generation solves the task of generating a data set from measured two-dimensional images that reproduces a property of the material point by point in three-dimensional space.


X-ray image processing

We have extensive expertise in the field of X-ray image processing, with which we can examine objects, almost irrespective of material and size, for a wide range of inadequacies arising, for example, in production.